
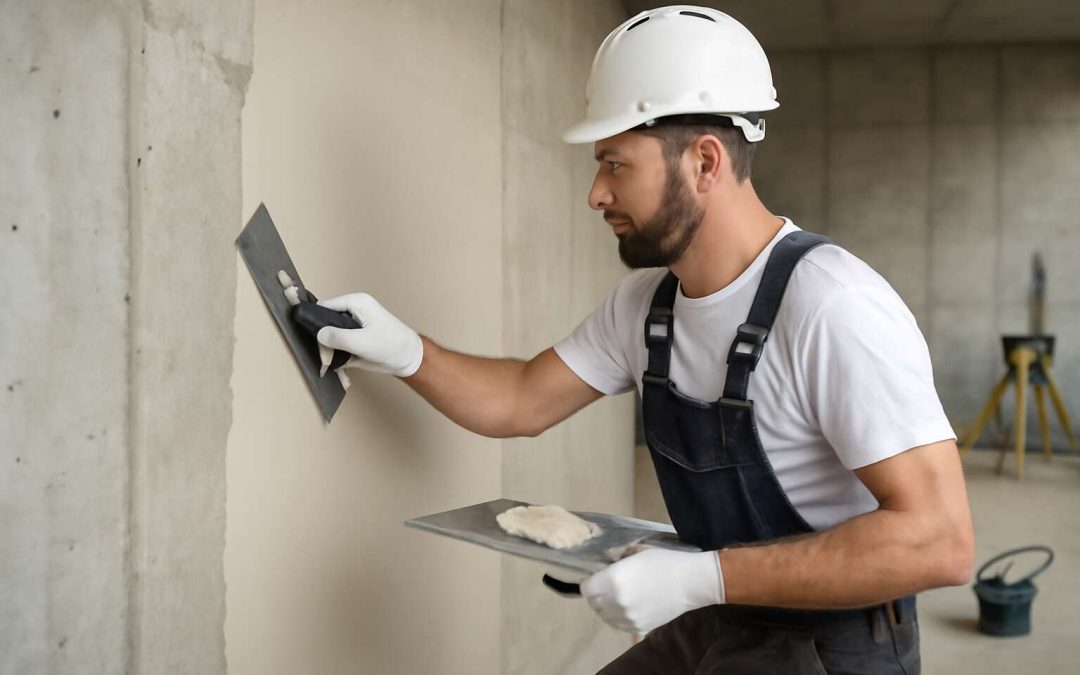
Understanding Precast Walls and Their Characteristics
Definition and Types of Precast Walls
Precast walls have become the silent giants of modern construction—offering durability, speed, and a sleek finish. They’re manufactured off-site, then transported and assembled on-site, transforming the landscape with remarkable efficiency. Understanding how to plaster precast walls is crucial for ensuring a seamless aesthetic that withstands South Africa’s dynamic climate. Each precast panel carries its own unique character—sometimes smooth, other times textured—demanding a tailored plastering approach.
There are several types of precast walls, each with distinct characteristics. Some are made of concrete, while others incorporate fiber-reinforced composites or architectural finishes. Recognizing these differences is essential for choosing the right plastering technique. For example, smooth precast surfaces might require a different approach than textured or patterned panels, but the goal remains the same: achieving a flawless, long-lasting finish that elevates the structure’s visual appeal.
When it comes to how to plaster precast walls, preparation is everything. Proper surface cleaning, moisture control, and surface profiling set the stage for success. Whether you’re working with load-bearing panels or decorative facades, understanding the specific characteristics of your precast wall type will guide your plastering process, ensuring durability and aesthetic excellence in every square meter.
Common Materials Used in Precast Wall Construction
Precast walls, those silent giants of architecture, possess a captivating array of characteristics that demand a keen eye and an attentive hand. Their core materials—most notably concrete—serve as the backbone of resilience, standing firm against South Africa’s capricious climate. These panels often boast a textured or smooth surface, each telling its own story of craftsmanship and purpose. Understanding the intricacies of these materials is essential when learning how to plaster precast walls, for every surface carries its own unique personality.
Common materials used in precast wall construction include reinforced concrete, fiber-reinforced composites, and architectural finishes that lend both strength and aesthetic allure. The choice of material influences the plastering process profoundly, dictating the preparation techniques and finishing methods. For instance, reinforced concrete panels require a different approach compared to fiber-reinforced composites, which may demand additional surface profiling to ensure optimal adhesion.
- Concrete panels with a smooth finish often call for a meticulous surface preparation to enhance grip.
- Textured or patterned precast surfaces may require specialized bonding agents to ensure a seamless plastering process.
- Architectural finishes, sometimes incorporating decorative elements, demand a tailored approach for aesthetic harmony.
By grasping the fundamental materials and their inherent qualities, craftsmen can master how to plaster precast walls with finesse, transforming utilitarian panels into canvases of beauty and durability. Each element, from the raw material to the finished coat, weaves into a narrative of craftsmanship and resilience—an ode to modern engineering’s silent giants.
Advantages and Challenges of Precast Walls
Precast walls are the unsung heroes of modern construction—silent, sturdy, and surprisingly versatile. Their characteristics can vary wildly, from ultra-smooth surfaces to boldly textured finishes, each presenting its own set of challenges and opportunities when learning how to plaster precast walls. These panels are designed for durability, often made from reinforced concrete or composite materials that can withstand South Africa’s unpredictable climate. Yet, their resilience doesn’t mean they’re a walk in the park when it comes to finishing them off with plaster.
One of the main advantages of precast walls is their rapid installation, which saves time and labor costs. However, this speed can come with challenges—like ensuring proper adhesion for the plaster. Precast surfaces, especially those with textured finishes, demand tailored preparation techniques. To achieve a flawless finish, understanding the specific material and surface personality is crucial. For instance, smooth concrete panels might need roughening or the application of bonding agents, while textured surfaces often require specialized primers to ensure the plaster adheres seamlessly.
In the quest of how to plaster precast walls effectively, awareness of these nuances paves the way for professional results. The key to success lies in recognizing the unique advantages and potential hurdles of each precast panel, ensuring that every coat of plaster not only sticks but also elevates the wall’s aesthetic appeal. After all, a well-plastered precast wall is not just about durability—it’s about transforming a utilitarian panel into a true architectural statement.
Preparing Precast Walls for Plastering
Assessing the Wall Surface
Before diving into the art of how to plaster precast walls, it’s crucial to assess the surface meticulously. A precast wall might look smooth, but beneath that veneer lies a complex tapestry of textures and potential imperfections. Surface assessment isn’t just a routine check; it’s the key that unlocks a flawless finish. Cracks, chips, or uneven patches can sabotage your entire plastering process if left unaddressed.
Start by examining the wall for any signs of damage or inconsistencies. Use a straightedge or level to identify high or low spots—these must be corrected to ensure an even plaster layer. Moisture levels are equally important; excessive dampness can jeopardize adhesion and cause future issues. In some cases, applying a bonding agent or a primer enhances the plaster’s grip, especially on non-porous precast surfaces.
To prepare the surface adequately, consider these steps:
- Clean off dust, grease, or loose debris thoroughly.
- Sand rough patches to create a better key for the plaster.
- Apply a suitable bonding agent if necessary, ensuring it penetrates deep into the surface.
Mastering how to plaster precast walls begins long before the first trowel touches the surface—assessment and preparation are where the journey starts, revealing the subtle nuances that make or break a perfect finish.
Cleaning and Dust Removal
Preparing precast walls for plastering is a critical step that can make or break the final finish. Dust and debris are the enemies of good adhesion, so thorough cleaning is essential. Leftover dust can weaken the bond between the surface and the plaster, leading to cracks or future delamination. Take the time to remove all loose particles and grease, which can compromise the plaster’s durability.
Once the surface is free of dirt, consider the following steps to ensure proper preparation:
- Use a stiff brush or high-pressure water jet to scrub the wall clean.
- Allow the wall to dry completely before proceeding.
- Sand any rough patches for a smoother surface, creating a better key for the plaster.
- Apply a bonding agent if the precast surface is non-porous or particularly slick, as this improves adhesion significantly.
Understanding how to plaster precast walls begins with meticulous cleaning and dust removal—this foundation ensures a seamless, long-lasting finish. Skipping this step often results in issues that are costly and time-consuming to fix later. Proper preparation sets the stage for a professional plastering job that stands the test of time.
Repairing Surface Imperfections
In the shadowed realm of construction, the secret to mastering how to plaster precast walls lies in the meticulous art of repairing surface imperfections. These flaws—cracks, chips, and uneven patches—are the silent enemies of a flawless finish, lurking beneath the surface like fractures in a ancient tomb. To summon a seamless layer of plaster, one must first confront these blemishes with unwavering precision.
Begin by visually inspecting the wall for any cracks or spalled areas. Use a burr or chisel to gently remove loose material, exposing a clean, stable substrate. For deeper cracks, injecting a suitable filler or epoxy ensures structural integrity and prevents future deterioration. Once the surface is free of loose debris, sand the area to create a roughened, textured key—this allows the plaster to grip with unyielding tenacity. Remember, neglecting this step often results in delamination or unsightly cracks that mar the final visage.
In some cases, applying a bonding agent over the repaired zones may be necessary, especially if the precast surface is slick or non-porous. This layer acts as a mystical conduit, enhancing adhesion and ensuring that the plaster becomes one with the wall’s spectral surface. When you understand how to plaster precast walls with such precision, the result is a durable, hauntingly beautiful finish that endures the test of time and elements.
Ensuring Proper Surface Roughness
Mastering the art of how to plaster precast walls begins long before the first coat of plaster touches the surface. Proper preparation is the secret to achieving a flawless finish that endures the test of time. The key lies in ensuring the surface roughness is just right—neither too smooth nor excessively textured—creating an ideal bond that will stand firm against environmental challenges.
To achieve this, start by thoroughly cleaning the wall, removing dust, grease, and any loose debris that might hinder adhesion. Once the surface is pristine, it’s essential to create a textured profile that allows the plaster to grip securely. This can be achieved through light sanding or abrading the surface with a stiff brush, which introduces micro-roughness. For areas that require a more pronounced key, applying a bonding agent or primer can significantly enhance adhesion, especially on slick or non-porous precast surfaces.
In certain cases, a simple
- roughening process
- application of bonding agents
- use of suitable primers
can make all the difference. These steps are crucial in the journey of how to plaster precast walls, transforming a seemingly unyielding surface into a receptive canvas for the plaster to bond seamlessly. When the surface is prepared with precision, the final coat of plaster forms a durable, aesthetically pleasing shell that will withstand South Africa’s diverse climate conditions with unwavering strength and beauty.
Materials and Tools Needed for Plastering Precast Walls
Types of Plaster Suitable for Precast Walls
When it comes to transforming those sturdy precast walls into smooth, paint-ready canvases, the right materials and tools are your best friends. Believe it or not, knowing how to plaster precast walls isn’t just about slapping on some mud; it’s about selecting the perfect blend of supplies that ensure durability and a flawless finish. For starters, you’ll need a high-quality plaster mix—think of it as the foundation for your masterpiece. A good bonding agent is also essential, especially if the wall surface isn’t naturally receptive to plaster. As for tools, a sturdy plaster trowel, hawk, and mixing drill with a paddle attachment will make your life a whole lot easier. Don’t forget a spirit level to keep things straight and a damp sponge for that final smoothing touch.
- Plastering float
- Sandpaper or abrasive pads
Knowing how to plaster precast walls with the right materials and tools makes all the difference between a shoddy patch job and a professional-looking finish that lasts decades.
Choosing the appropriate plaster type is equally vital. For precast walls, a versatile and flexible plaster such as cement-based or acrylic-based plaster often does the trick. These are designed to handle the slight movements and surface irregularities typical of precast concrete. Lime plaster is another option, especially if you’re after a breathable wall finish that resists cracking and offers a natural aesthetic. Remember, selecting the right plaster isn’t just about adhesion but also about ensuring longevity and resistance to South Africa’s unpredictable climate. With the right combination of materials and a bit of skill, you’ll master the art of how to plaster precast walls efficiently—leaving behind a surface that’s both smooth and resilient.
Essential Tools and Equipment
Mastering how to plaster precast walls begins with possessing the right arsenal of materials and tools. These essentials form the backbone of a high-quality finish that not only looks impeccable but also endures South Africa’s diverse climate conditions. When embarking on this task, selecting durable plaster mixes is paramount—cement-based or acrylic-based plaster are popular choices due to their flexibility and resilience. A reliable bonding agent ensures the plaster adheres seamlessly, especially on surfaces that are less receptive.
In terms of equipment, a sturdy plaster trowel and hawk are indispensable for applying and smoothing the plaster with precision. A mixing drill equipped with a paddle attachment helps achieve a consistent blend, reducing manual effort and ensuring an even application. Don’t forget a spirit level to maintain straight lines and a damp sponge for that final, flawless finish. Additionally, a plastering float combined with abrasive pads can be used to refine the surface, creating a smooth, professional appearance.
Here’s a quick overview of the essential materials and tools needed for how to plaster precast walls:
- High-quality plaster mix (cement-based or acrylic-based)
- Bonding agent suitable for precast surfaces
- Plaster trowel and hawk
- Mixing drill with paddle attachment
- Spirit level for accuracy
- Damp sponge for smoothing
- Plastering float and abrasive pads for finishing
By gathering these materials and tools beforehand, you set yourself on the path to transforming rough precast surfaces into sleek, durable walls. When you understand the nuances of each component, learning how to plaster precast walls becomes less daunting and more a testament to craftsmanship that lasts for decades.
Choosing the Right Primer and Bonding Agents
In the artful dance of transforming raw precast walls into polished masterpieces, selecting the right primer and bonding agents is nothing short of essential. A well-chosen bonding agent acts as the silent ambassador, ensuring the plaster embarks on its journey with unwavering allegiance to the surface. Understanding the nuances of these materials can make the difference between a surface that crumbles under South Africa’s capricious climate and one that stands resilient for decades.
When learning how to plaster precast walls, it’s crucial to recognize that not all primers are created equal. A high-quality bonding agent tailored for precast surfaces promotes superior adhesion, preventing future cracks or delamination. It’s a subtle, yet powerful, player in the grand scheme—ensuring your plaster stays put through seasonal shifts and daily wear.
- Start by cleaning the surface thoroughly, removing dust and loose debris.
- Apply the bonding agent evenly using a brush or roller, ensuring full coverage.
- Allow the primer or bonding agent to cure according to manufacturer instructions before applying the plaster.
In South Africa, where climate fluctuations can test the durability of finishes, selecting the proper primer and bonding agents isn’t merely a technical step—it’s a safeguard for long-lasting elegance. When you master the art of these preliminary preparations, your journey on how to plaster precast walls becomes a testament to craftsmanship that endures the test of time.
Step-by-Step Guide to Plastering Precast Walls
Applying Primer or Bonding Agent
Mastering the art of how to plaster precast walls might seem as daunting as teaching a cat to fetch, but with the right approach, it’s entirely achievable. The first step in this plastering saga is applying a primer or bonding agent—think of it as laying the foundation for a fairy tale. This layer ensures that the plaster adheres like a loyal puppy, preventing any future flakiness or detachment. A poorly bonded surface is the equivalent of trying to stick a post-it note to a greasy window—pointless and frustrating.
To ensure optimal bonding, start by evenly coating the precast surface with a high-quality primer or bonding agent. Use a brush or roller, making sure to reach every nook and cranny. If the surface is particularly smooth or slick, consider creating a slight roughness with a wire brush or sanding block. This added texture acts as a handshake between the wall and the plaster, fostering a bond that can withstand South Africa’s wild weather. Remember, a good primer isn’t just an optional extra—it’s the secret sauce to achieving a flawless plaster finish on precast walls.
Preparing the Plaster Mix
Preparing the plaster mix is a crucial step in mastering how to plaster precast walls. It’s where craftsmanship meets patience and a touch of intuition. The right mixture ensures a smooth, durable finish that can withstand South Africa’s often unpredictable weather. Start by selecting high-quality materials—cement, sand, and water—and measure them carefully. The goal is a consistency that’s neither too runny nor too stiff, allowing the plaster to spread evenly without sagging or cracking.
Next, combine the dry ingredients thoroughly before slowly adding water. As you stir, watch for a creamy, lump-free texture that clings to your trowel—this is the hallmark of a well-prepared plaster. For a bit of extra adhesion and weather resistance, some professionals add bonding agents or plasticizers, especially when working with precast surfaces that demand a superior bond. Remember, the quality of your plaster mix directly influences the ease of application and the long-term aesthetic of the wall.
- Measure out the correct ratios of cement, sand, and water based on the desired thickness.
- Mix the dry ingredients thoroughly in a clean container or on a mixing board.
- Gradually add water while continuously stirring until the mixture reaches a smooth, workable consistency.
Once the plaster is mixed to perfection, it’s ready to be applied onto the primed precast surface, setting the stage for a flawless finish that stands the test of time and weather. Mastering how to plaster precast walls begins with this meticulous preparation, blending science with a craftsman’s touch—each batch a step closer to transforming cold concrete into a warm, inviting space.
Applying the Initial Coat (Key Coat)
Applying the initial coat, or key coat, to precast walls is where craftsmanship truly begins to shine. This foundational layer sets the tone for the entire plastering process, ensuring a smooth and durable finish that can withstand South Africa’s capricious weather patterns. The secret to mastering how to plaster precast walls lies in precision and patience—think of it as laying the first brushstrokes of a masterpiece.
Start by applying the plaster mix with a robust trowel, working from the bottom up to ensure even coverage. The goal here is to create a strong bond between the plaster and the primed surface, so don’t rush. A good rule of thumb is to work in manageable sections, ensuring that each is adequately filled and leveled before moving on. For large surfaces, using a hawk and trowel in tandem can help maintain consistency and control, preventing unsightly ridges or hollows from marring your handiwork.
If you need to prioritize efficiency, consider this simple
- technique:
- Apply a thin, even layer of the plaster mixture, pressing firmly with your trowel to embed the material into the surface.
- Feather the edges to blend seamlessly with the existing surface, avoiding abrupt transitions that might crack or chip over time.
- Regularly check your work with a spirit level, ensuring that your key coat remains flat and true to the desired wall plane.
This step, while seemingly straightforward, demands a keen eye and a steady hand—hallmarks of a true artisan. Achieving a perfect initial coat paves the way for subsequent layers, transforming a cold precast shell into a warm, inviting space that will endure for decades to come. After all, the beauty of a well-executed plaster job lies in its subtlety—each stroke a testament to patience and precision in the art of how to plaster precast walls.
Applying the Finishing Coats
Mastering how to plaster precast walls isn’t just about smearing some mud on the surface; it’s an art form that demands finesse, patience, and a dash of stubbornness. Once the initial coat, or key coat, is perfected, the real magic begins—applying those finishing coats that transform a cold, industrial shell into a stunning showcase. The secret lies in the layering process, where each coat must be meticulously applied to ensure durability and aesthetic appeal. But how do you navigate this delicate dance with your plaster brush? It’s simpler than you think, provided you follow a step-by-step approach that respects the material’s quirks and your own craftsmanship.
When applying the finishing coats for your precast wall, start with a clean, dust-free surface—no shortcuts here! The goal is to achieve a uniform, smooth layer that will serve as a perfect backdrop for subsequent decorative or protective finishes. Use a softer trowel or a finishing float to spread the plaster evenly, working in small sections to maintain control. For a flawless look, feather the edges to blend seamlessly into the underlying coat, avoiding any harsh lines or ridges that could crack or chip over time. Remember, patience is your best friend—rushing these steps risks undermining the entire effort.
To ensure your plaster adheres properly and remains resilient against South Africa’s unpredictable weather, consider this technique:
- Apply thin, consistent layers—thick coats are the enemy of a smooth finish.
- Always keep your tools damp, preventing the plaster from sticking prematurely and creating unsightly lumps.
- Regularly check your work with a spirit level or straightedge—the last thing you want is a wavy wall that screams amateur hour.
Once you’ve laid down the final coat, give it some time to cure properly. This might mean protecting the surface from direct sunlight or moisture, depending on the weather forecast—and trust me, South African weather can be as capricious as a cat on a hot tin roof! The finishing coats should be a testament to your skill—smooth, even, and flawless, ready to face whatever elements come its way. Achieving this level of finesse in how to plaster precast walls is what separates the good from the great—and in this trade, the devil is truly in the details.
Leveling and Smoothing the Surface
Mastering how to plaster precast walls involves more than just applying a layer of plaster. Achieving a perfectly smooth and level surface requires meticulous attention to detail. Once the initial key coat is set, the next critical step is leveling and smoothing the surface to prepare it for finishing coats. This process ensures your wall not only looks professional but also withstands the test of time and weather conditions.
Start by inspecting the wall carefully, checking for any high or low spots. Use a straightedge or spirit level to identify uneven areas. If necessary, lightly scrape or sand these imperfections to create a uniform base. When applying the finishing coats, work in small sections to maintain control. Use a damp trowel or finishing float to spread the plaster evenly, feathering the edges to blend seamlessly into the previous layer. This technique minimizes ridges and helps achieve a smooth, flawless surface.
To ensure proper leveling and smoothing, consider these tips:
- Apply thin, consistent layers to prevent cracking and unevenness.
- Keep your tools damp to avoid premature sticking and lumps.
- Regularly check your work with a straightedge or spirit level for a perfectly flat finish.
Patience and precision are your allies when learning how to plaster precast walls. The effort invested in this step will pay dividends, resulting in a wall that looks polished and is ready for the final decorative or protective finishes.
Drying and Curing Process
The journey of mastering how to plaster precast walls extends well beyond the initial application. Once your plaster begins to set, the drying and curing process becomes a silent testament to patience and precision. It’s during this phase that the true character of your work reveals itself—cracks are born from haste, but strength is forged through time.
In South Africa’s climate, understanding the nuances of drying and curing is crucial. The moisture content must diminish gradually, allowing the plaster to develop durability without cracking or peeling. To facilitate this, it’s often recommended to keep the environment consistently humid, especially in dry or windy conditions, which can prematurely dry the surface and cause fissures.
A simple yet effective approach involves covering the freshly plastered wall with damp cloths or plastic sheeting, ensuring a slow, even evaporation. This method supports the natural curing process, promoting a resilient, long-lasting finish. Remember, the secret to a flawless plastered surface lies not just in how to plaster precast walls but in respecting the delicate balance of time and environmental control during drying and curing.
Tips and Best Practices for a High-Quality Finish
Maintaining Proper Moisture Levels
Maintaining proper moisture levels during the plastering process can transform a simple wall into a masterpiece of craftsmanship. When learning how to plaster precast walls, controlling humidity is paramount—too much moisture can weaken the plaster, while too little can cause cracking and poor adhesion.
A moisture-balanced environment ensures the plaster bonds seamlessly, resulting in a high-quality finish that endures the test of time. To achieve this, it’s essential to regularly monitor humidity levels with a hygrometer and employ techniques like misting or covering the surface with damp cloths during the initial stages of application.
Remember, patience is the key! Ensuring the plaster remains moist enough for proper curing fosters durability and a flawless surface. Proper moisture management not only elevates the aesthetic appeal but also fortifies the wall against future wear and tear, making your work truly stand out.
Working in Suitable Weather Conditions
In the delicate dance of mastering how to plaster precast walls, working under suitable weather conditions becomes an understated yet pivotal element. The South African climate, with its capricious shifts between intense heat and sudden downpours, demands a keen sense of observation and adaptability. When the environment teeters towards extremes—either scorching or overly humid—the integrity of your plaster finish can be compromised, leading to unsightly cracks or inadequate adhesion.
Optimal weather conditions—mild temperatures, low humidity, and calm breezes—craft an ideal backdrop for achieving a high-quality plaster finish. If you notice the air is excessively humid, it’s prudent to delay application or employ protective measures such as windbreaks or temporary shelters. Conversely, during hot days, working during cooler hours or using misting techniques can help maintain surface moisture, preventing premature drying that hampers bonding.
Consider these best practices:
- Always monitor weather forecasts before commencing work.
- Plan your plastering schedule during periods of stable, moderate weather.
- In extreme conditions, utilize temporary coverings or fans to regulate temperature and humidity.
Staying vigilant about environmental factors ensures that each coat of plaster adheres seamlessly, culminating in a finish that is both aesthetically impeccable and enduring. The right weather conditions are the unseen foundation for mastery in how to plaster precast walls—an aspect often underestimated but ultimately decisive in elevating craftsmanship to art.
Techniques for Achieving a Smooth Finish
Achieving a flawless finish when learning how to plaster precast walls is more than just technique—it’s a delicate balance of skill and environmental mastery. One overlooked yet critical aspect is controlling the working environment. The South African climate’s unpredictability can turn a straightforward project into a nightmare of cracks and peeling if not managed properly. Temperatures that soar or humidity that spikes can sabotage your effort, leaving an uneven, compromised surface behind.
To ensure the best results, it’s essential to monitor weather conditions meticulously. During extreme heat, working during cooler parts of the day or employing misting techniques can help maintain surface moisture and prevent premature drying. When humidity levels are high, employing temporary shelters or windbreaks can shield the plaster from dampness, ensuring proper adhesion and a smooth, durable finish.
By integrating these best practices—such as scheduling work during stable weather and using environmental controls—you create a resilient foundation for your plastering project. Remember, understanding how to plaster precast walls effectively hinges on more than technique; it’s about mastering the environment to let your craftsmanship shine through seamlessly. The unseen influence of weather conditions can make or break the final aesthetic, elevating your work from ordinary to extraordinary!
Common Mistakes to Avoid
Mastering the art of how to plaster precast walls is a journey that demands more than just technical skill; it’s a dance with the elements. One of the most insidious pitfalls many craftsmen fall into is neglecting the subtle whispers of the environment. Weather fluctuations—whether scorching South African sun or sudden humidity spikes—can transform a pristine surface into a canvas of cracks and imperfections. Recognizing these risks and embracing strategic environmental controls is essential to elevate your craftsmanship beyond the ordinary.
Common mistakes to avoid include rushing the process or neglecting surface preparation, which can cause delaminations or uneven textures. To achieve a high-quality finish, meticulous attention to detail during each stage of plastering is crucial. A well-prepared surface combined with proper timing—such as working during cooler parts of the day—can make all the difference. Remember, when learning how to plaster precast walls, patience and environmental awareness are your most powerful allies in creating a seamless, durable surface that stands the test of time!
Troubleshooting Common Issues During Plastering
Cracking and Peeling
Cracking and peeling are the silent enemies lurking behind a seemingly flawless plaster job on precast walls. These issues often arise from subtle imperfections—like uneven surface roughness or inadequate surface preparation—that can compromise the entire finish. When plaster begins to crack, it’s as if the wall itself whispers tales of neglect, but with keen observation, you can catch these signs early.
Uneven drying or improper mixing techniques can also cause peeling, leaving patches that refuse to adhere. To troubleshoot effectively, examine the plaster for areas where it shows signs of delamination or hairline fractures. An essential step is ensuring the surface is free of dust and loose particles—so the plaster can bond seamlessly.
In some cases, reapplying a bonding agent or adjusting the plaster mix ratio can address these issues. Remember, patience is key—allowing the plaster to cure fully and maintaining consistent moisture levels helps prevent future cracking and peeling, ensuring your work on how to plaster precast walls stands the test of time!
Uneven Surfaces
Uneven surfaces are one of the biggest hurdles when learning how to plaster precast walls. Even small inconsistencies can lead to visible imperfections that undermine the entire finish. Recognising these issues early makes all the difference. Look for areas where the plaster appears lumpy or uneven, especially after the initial coat. These spots often signal underlying surface irregularities that need correction.
Addressing uneven surfaces requires careful preparation. If the surface is too rough or too smooth, the plaster may not adhere properly. Using a bonding agent can help improve adhesion, but it’s equally important to ensure the surface is properly prepared before application. Sometimes, a light sanding or adding a leveling compound can create a more consistent base.
- Start with a thorough assessment of the wall’s surface.
- Remove any loose debris or dust to ensure a clean base.
- Apply a bonding agent if necessary.
- Use a straightedge or screed to identify high and low spots.
- Fill or sand down uneven areas to create a uniform surface.
Remember, patience during the surface preparation phase pays off. Properly prepared precast walls make the plastering process smoother and ensure a flawless, durable finish. When learning how to plaster precast walls, attention to detail at this stage can prevent costly repairs down the line!
Blistering or Bubbling
Blistering or bubbling during plastering is an insidious obstacle that can transform a sleek surface into a distorted canvas of imperfections. This phenomenon, often dismissed as superficial, actually signals deeper issues—moisture entrapment, incompatible materials, or improper surface preparation—that sabotage the integrity of your work. When learning how to plaster precast walls, understanding these subtleties is crucial to avoiding costly rework and ensuring a professional finish.
To troubleshoot effectively, it’s essential to identify the root cause. For instance, moisture can become trapped beneath the plaster if the surface isn’t adequately dried or if a damp primer was used. Alternatively, incompatible plaster mixes or applying plaster over a contaminated surface can trigger bubbling. Addressing these issues requires a meticulous approach: ensure the wall is thoroughly dried, and verify the compatibility of your materials before application.
In some cases, applying a bonding agent or primer can serve as a barrier that prevents moisture migration, but only if the underlying surface is properly prepared. If blistering persists, consider removing the affected layer and reapplying after correcting the underlying problem. This process often involves:
- Assessing the moisture levels of the precast wall.
- Ensuring proper surface drying before plaster application.
- Using high-quality, compatible plaster mixes tailored for precast walls.
- Implementing multiple thin coats rather than a single thick application to prevent entrapment of air or moisture.
Patience and vigilance during this troubleshooting process can make all the difference, transforming a potential flaw into a testament of craftsmanship. Mastering how to plaster precast walls with an eye for detail not only elevates the finish but preserves the durability of your work against the relentless forces of time and environment.
Efflorescence and Discoloration
Efflorescence and discoloration are the ghosts haunting many plastering projects, especially when learning how to plaster precast walls. These issues often appear as unsightly white deposits or uneven patches, threatening the integrity of your finish. The root causes are usually moisture migration or mineral salts traveling through the wall’s surface, revealing the unseen struggles beneath the surface.
Addressing these problems begins with diligent troubleshooting. First, identify the source of moisture—poor drainage, capillary action, or residual water from manufacturing. Then, ensure proper surface preparation by removing existing efflorescence and sealing porous areas with a suitable primer.
- Use breathable, salt-resistant plaster mixes
- Maintain consistent moisture levels during curing
These steps help prevent salts from migrating and causing discoloration later.
Sometimes, applying a penetrating sealer or a specialized efflorescence inhibitor can serve as a barrier against future salt deposits. If discoloration persists, removing and reapplying plaster after correcting moisture issues is often necessary. Vigilance at each stage—especially during plaster application—can mean the difference between a flawless finish and a remedial nightmare. When dealing with how to plaster precast walls, understanding and countering efflorescence and discoloration is essential for a durable, professional result that withstands time’s relentless assault.
Maintenance and Upkeep of Plastered Precast Walls
Cleaning and Inspection Tips
Maintaining the integrity of your plastered precast walls isn’t just about aesthetics—it’s about longevity. In South Africa’s challenging climate, moisture and dirt can swiftly compromise the surface if neglected. Regular cleaning and inspection are essential to catch issues before they escalate into costly repairs. This proactive approach preserves the strength of the plaster layer and ensures your walls remain impeccable for years to come.
When inspecting, look out for signs of cracking, efflorescence, or discoloration, which can indicate underlying moisture problems or surface degradation. Cleaning should be gentle but thorough, removing dust and dirt that can trap moisture and foster deterioration. For stubborn dirt, a soft brush combined with a mild detergent works wonders—avoid harsh chemicals that could weaken the plaster’s bond.
To streamline maintenance, consider implementing a routine checklist. This could include:
- Visual inspection for cracks or surface anomalies
- Cleaning with appropriate tools and cleaners
- Prompt repairs of minor surface issues
- Monitoring moisture levels and ventilation
Understanding how to plaster precast walls properly also involves ongoing upkeep—an unseen force that keeps your walls resilient against South Africa’s diverse climate challenges. When executed with precision and care, maintenance transforms from routine to ritual—an essential act in safeguarding your investment.
Touch-up and Repair Procedures
Maintaining the pristine appearance of your precast walls isn’t just about aesthetics; it’s about preserving their structural integrity in South Africa’s capricious climate. Over time, even the most expertly applied plaster can develop imperfections that demand timely touch-up and repair. Knowing how to plaster precast walls effectively can extend their lifespan and keep your property looking immaculate.
When it comes to touch-up procedures, start with a thorough inspection to identify cracks, chips, or surface irregularities. Small issues can often be remedied with a simple patching technique—carefully cleaning the area, applying a compatible primer, and then layering a fresh coat of plaster that matches the original finish. For more extensive damage, a systematic approach is essential:
- Remove loose or deteriorated plaster to create a sound base.
- Ensure the surface is clean, dust-free, and slightly roughened to improve adhesion.
- Apply a bonding agent to enhance the plaster’s grip on the existing surface.
- Mix the plaster to the correct consistency, considering weather conditions and the specific type of plaster used for your precast walls.
- Layer the plaster carefully, feathering the edges to blend seamlessly with the surrounding surface.
For optimal results, always monitor drying times and avoid applying repairs in adverse weather. This attention to detail ensures that your plastering efforts not only repair but restore the resilience of your precast walls—an essential step in the ongoing journey of how to plaster precast walls with precision and care.
Long-term Preservation Strategies
Maintaining the longevity and aesthetic appeal of your precast walls demands consistent upkeep. Long-term preservation strategies are essential to prevent deterioration, especially in South Africa’s diverse climate. Regular inspections help identify early signs of wear, such as cracks or discoloration, which can be addressed before they escalate into costly repairs.
Incorporating routine cleaning and dust removal is a straightforward yet effective way to preserve the plaster surface. Using gentle cleaning solutions and avoiding harsh abrasives ensures that the plaster’s integrity remains intact. For more durable protection, applying a high-quality sealant or protective coating periodically can shield your precast walls from moisture ingress and UV damage.
One of the most effective long-term preservation strategies involves understanding how to plaster precast walls correctly from the outset. Proper surface preparation, choosing the right plaster mix, and adhering to best practices in application all contribute to enhanced durability. Additionally, monitoring environmental conditions—like humidity and temperature—helps prevent issues such as efflorescence or peeling, ultimately extending the lifespan of your precast walls.
